I make jam (jelly for my friends on the other side of the pond) pretty much every year. I’m lucky enough to have some mature fruit trees on my property and hate the thought of the fruit going to waste. the birds and bugs get some, of course. But the trees produce so much that even the wildlife can’t eat it all. So every Autumn, I gather up as many plums, damsons, pears and blueberries as I can. Some, I wash and freeze, ready for recipes such as my Dairy Free Blueberry and Lemon Muffins and Upside Down Spiced Plum Cake. The rest, and any frozen fruit I have left over from last year, I turn into jam, which I give away as gifts at Christmas or sell to family and friends to cover the cost of the sugar and jars.
I don’t use any fancy ingredients or equipment to make my jams. I don’t own a sugar thermomotor, and have never bought Jam Sugar or Pectin. I use very simple, traditional recipes which I have adapted from my most ancient cookery book (see my About Page for more info) and I’ve never had an issue with the jams not setting.

Pectin is what sets your jam, without it it will stay runny. You can buy artificial pectin if you’re concerned about this, but it occurs naturally in fruit, especially in the skin and casing around the seeds and stones. The natural pectin stores diminish, however, as the fruit ripens, so use slightly underripe fruit, and don’t peel it or core it, just remove the stones or seeds. When picking fruit for jam, you’re looking for fruit that is the right colour, or it wont taste nice, but still firm. You know when you buy fruit in the supermarket, you sometimes think “I’ll leave that in the fruit bowl for a couple of days to soften up a bit before I eat it”? – that’s the perfect fruit for jam making, it looks yummy, but slightly to hard to eat and fully enjoy.
I also don’t use any preservatives when jam making, I simply sterilise and seal the jars in such a way that the jam will keep for up to 12months. I’ll share my sterilising and sealing techniques with you below, too.
If you enjoy this post, let me know and I’ll share some of my other jam recipes in the future, but for now, I’ll stick to a fruit we all have access to – Blackberries.
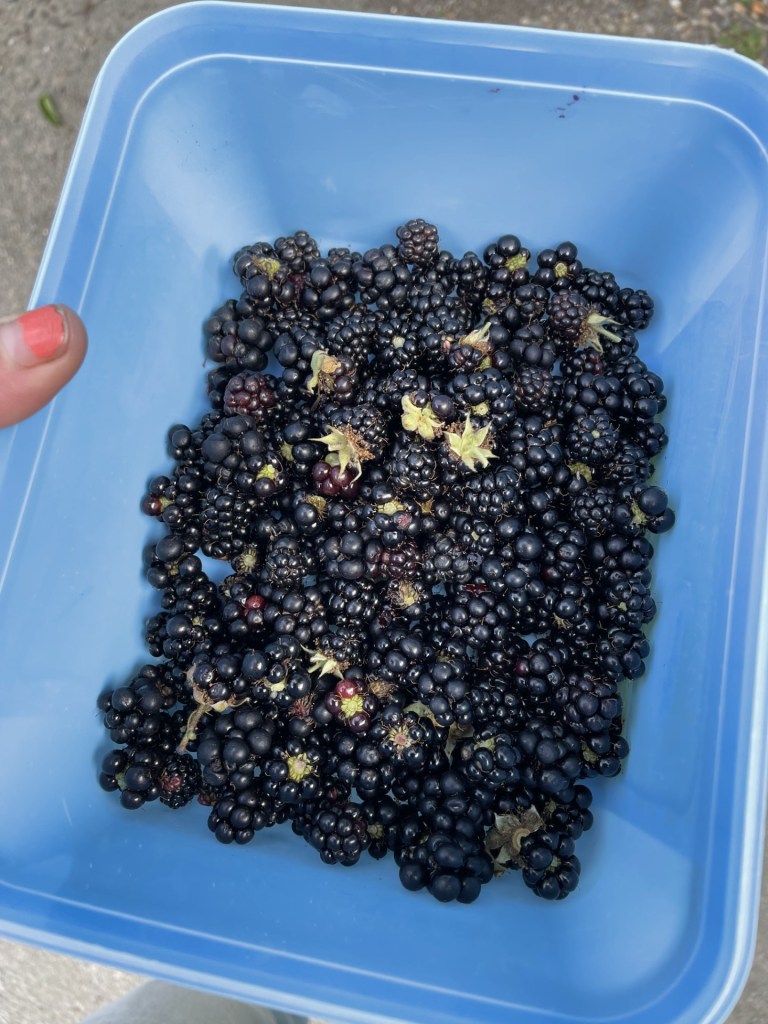
At this time of year the hedgerows in Britain are laden with them. So grab a tub and go for a wonder around your local park or country lanes and gather as many as you can. Just don’t go trespassing on anyone’s land, pick from public areas only.


Ingredients:
- 1-2kg of blackberries
- The same weight of granulated sugar as fruit
- 1 tablespoon of lemon juice
- A small knob of butter
Method:
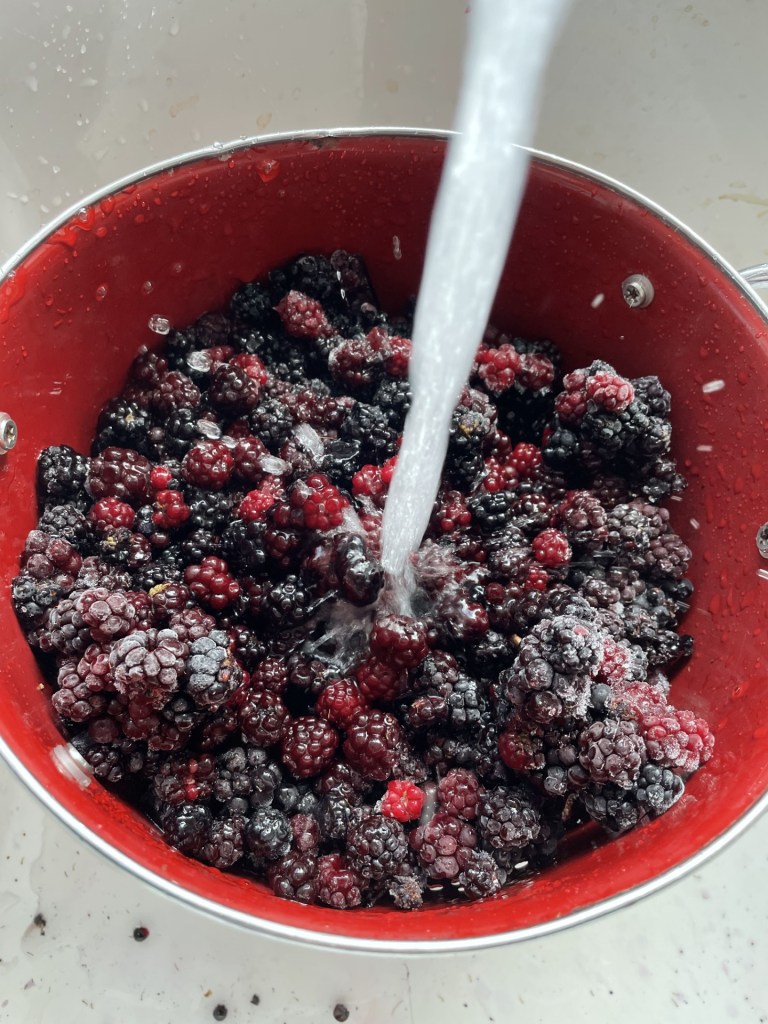
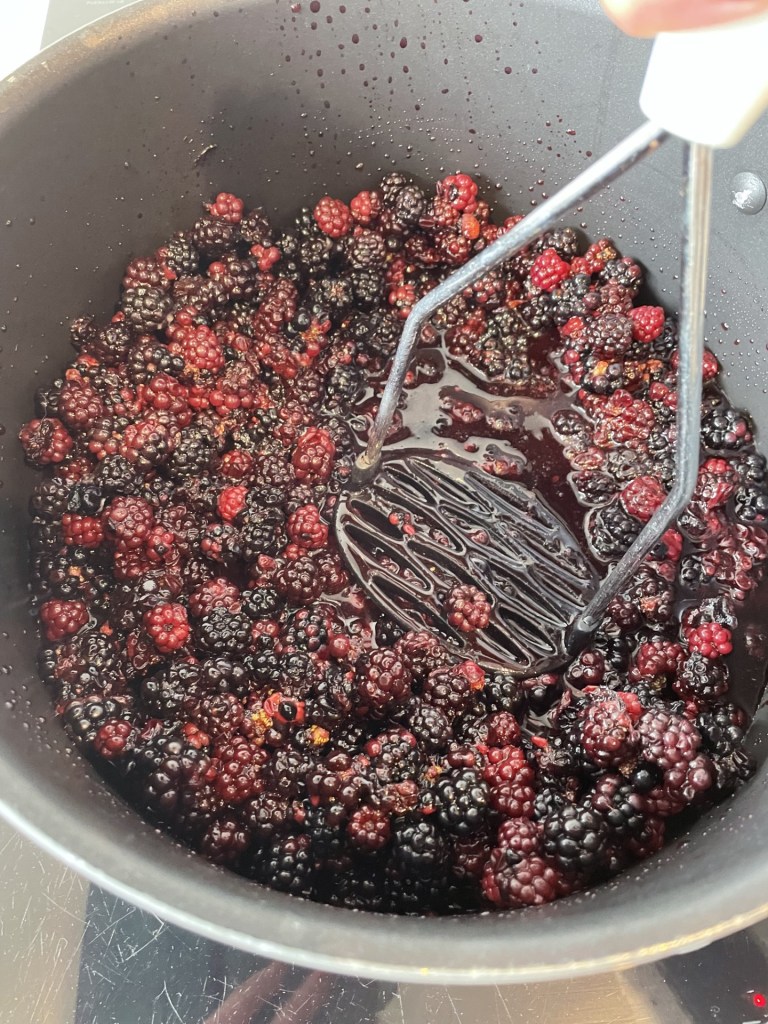
- Remove any leaves or stems from your blackberries, place in a colander and rinse well with clean, fresh, cold water. If you are using some frozen blackberries, add these to the fresh ones now. The cold water will gently defrost them.

- Place the fruit in a large, clean, dry pan and place on a high heat on the hob.
- Add the lemon juice, and mash the fruit to break it down as it comes up the boil.

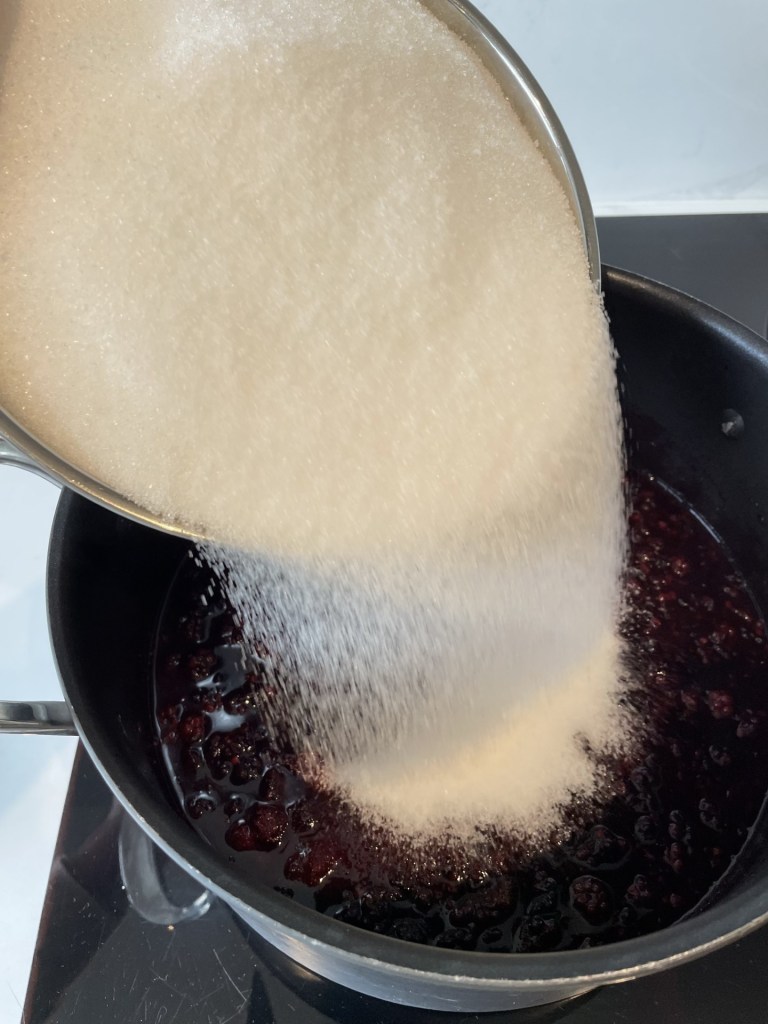
- When the fruit starts to boil, add the sugar and mix well.
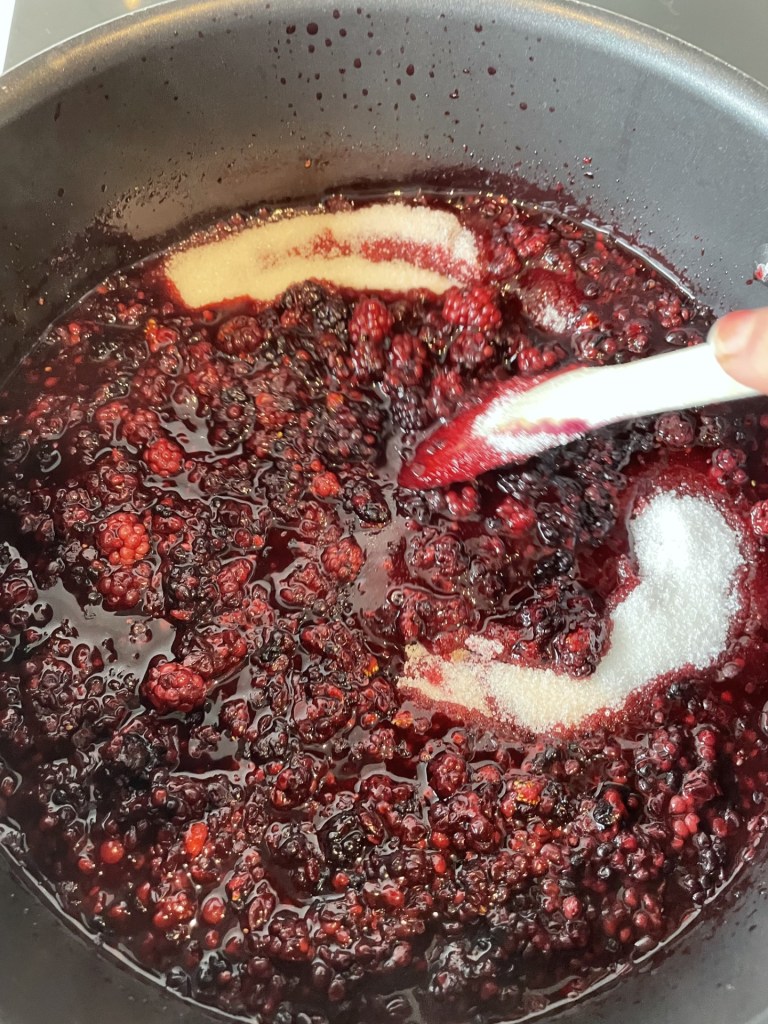
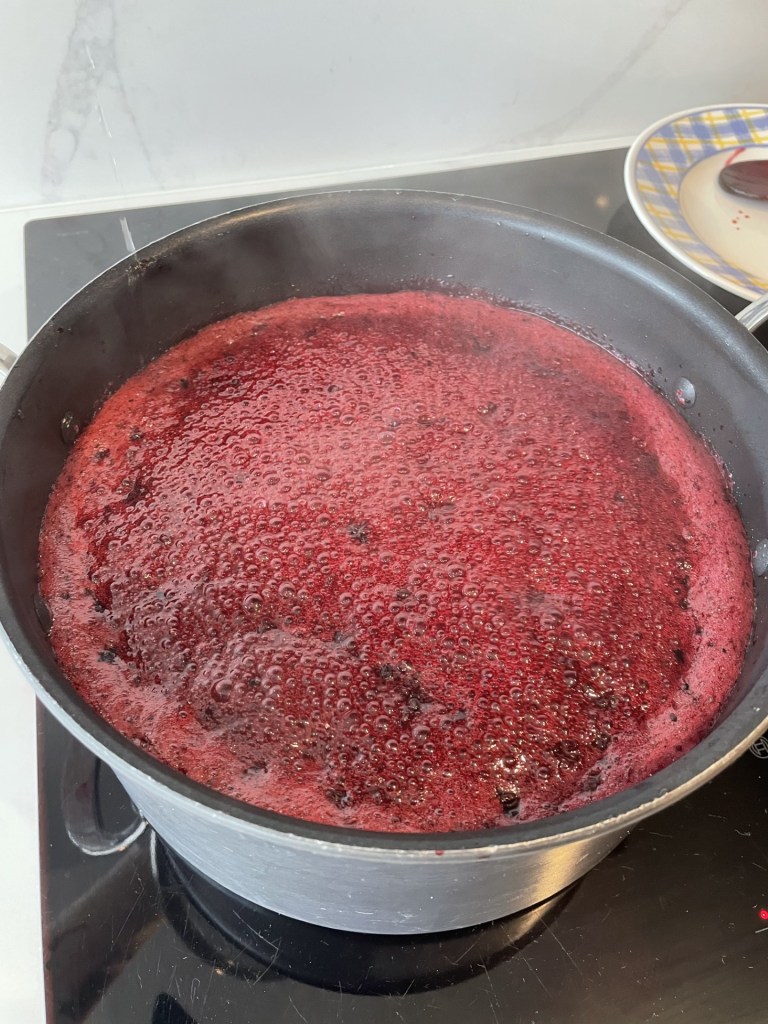
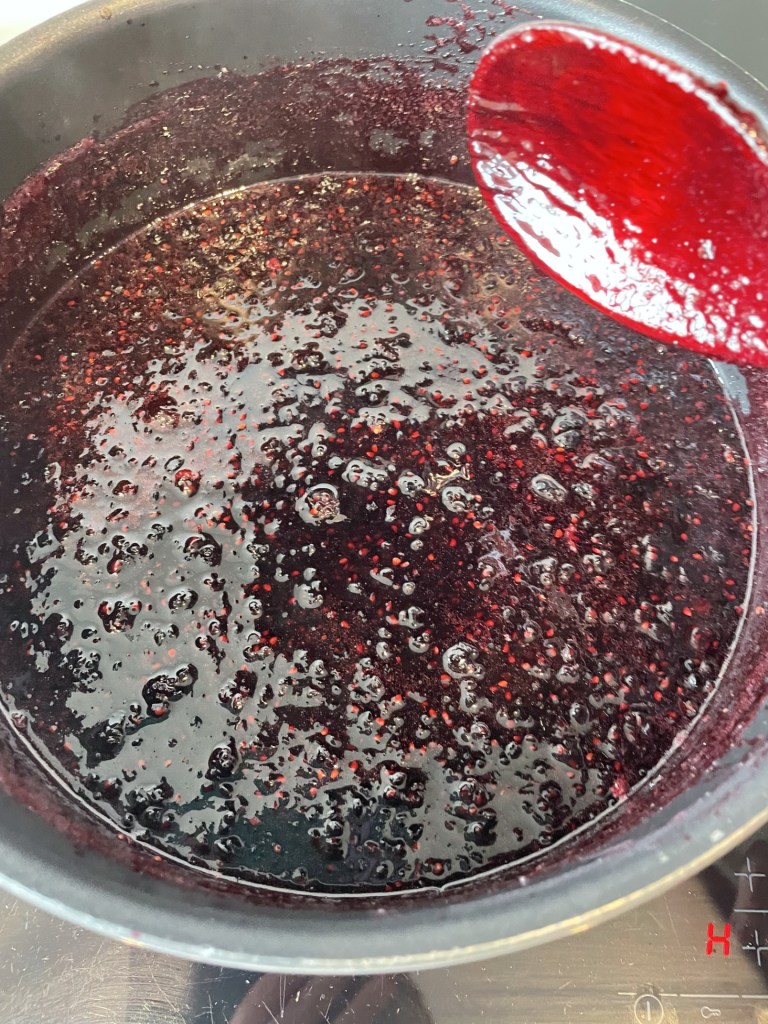
- Bring the mixture up to a rolling boil (so it’s bubbling in the centre of the pan as well as the edges) and boil for about 20mins, stirring occasionally to make sure it doesn’t burn at the bottom of the pan.
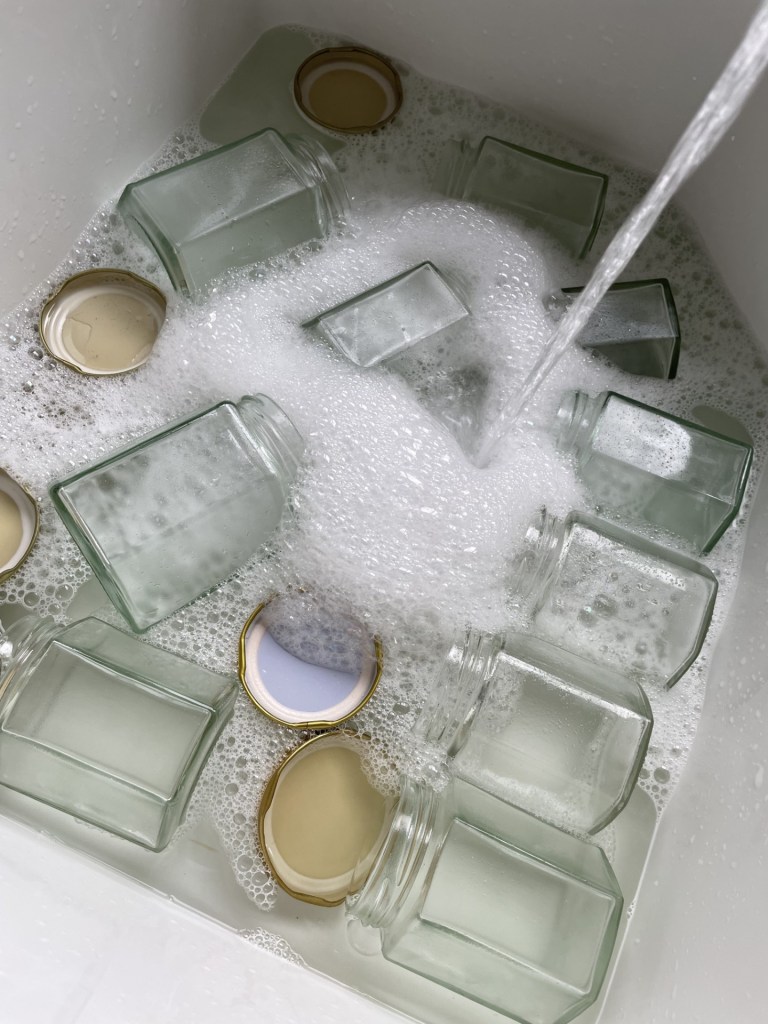
- Meanwhile, wash your jars and lids in very hot, soapy water, or in the dishwasher on a hot wash. Even if the jars are brand new or already clean, wash them again.
- Rinse well, and leave to dry on a clean kitchen towel.
- It is very important not to let anything touch the inside of the jars, the rims or the inside of the lids from now on. Even if your hands are freshly washed, they wont be sterile.
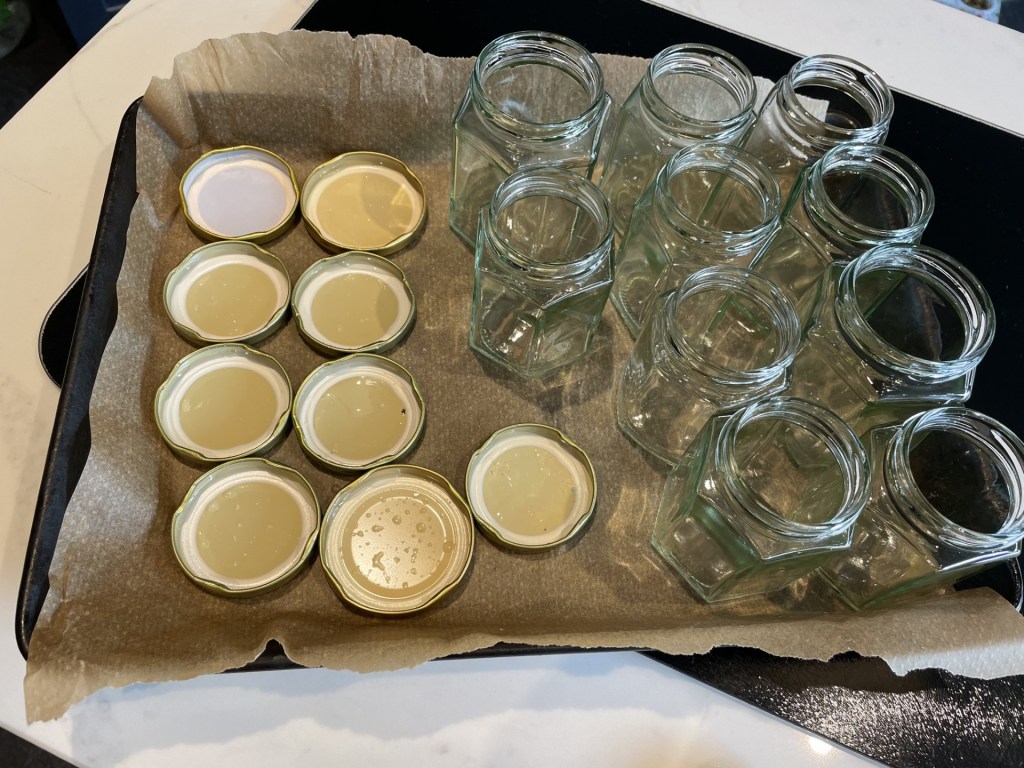
- Heat the oven to 160c / 140c fan / gas mark 2.
- Once the jars and lids have air dried for a few mins (don’t worry of they’re still damp. DO NOT dry them with a towel or even kitchen roll) lay them out on a baking tray, inside of the lids, and open side of the jars facing up.
- Pop them in the oven for 15-20mins, then turn the oven off, but leave the jars and lids in there and don’t open the door.
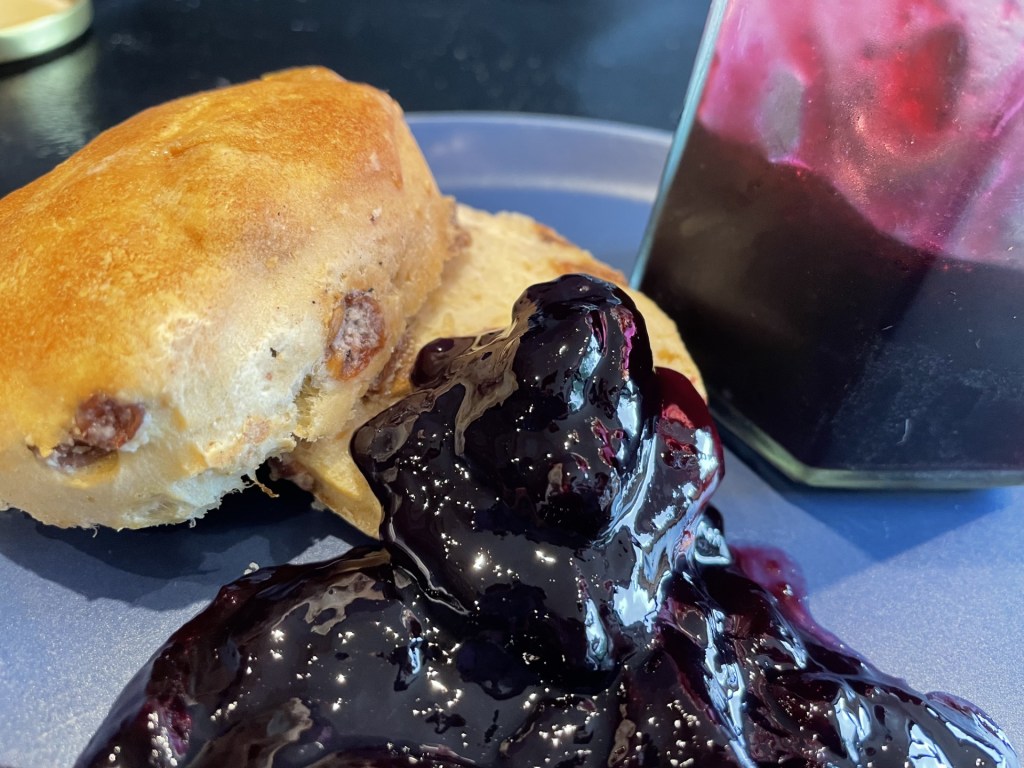
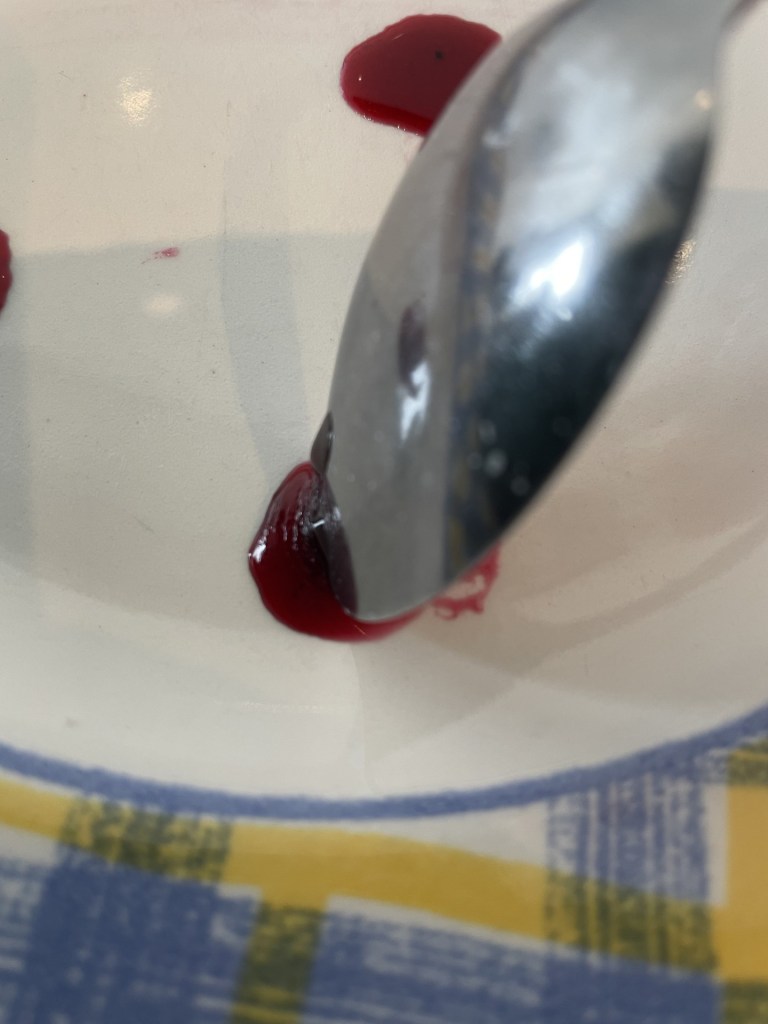
- Once the jam mixture has darkened and reduced slightly, put a drop onto a saucer and leave it to cool down for 2mins. Then, push it gently with the back of a spoon, and if the mixture crinkles, it’s ready. If it doesn’t, continue to boil and test again.
- Once the jam crinkles, turn off the heat, add the butter and mix well. The butter will disperse the scum that forms on the top from boiling. If you’re vegan, you can skip the butter and instead, spoon the scum off the top and discard it.
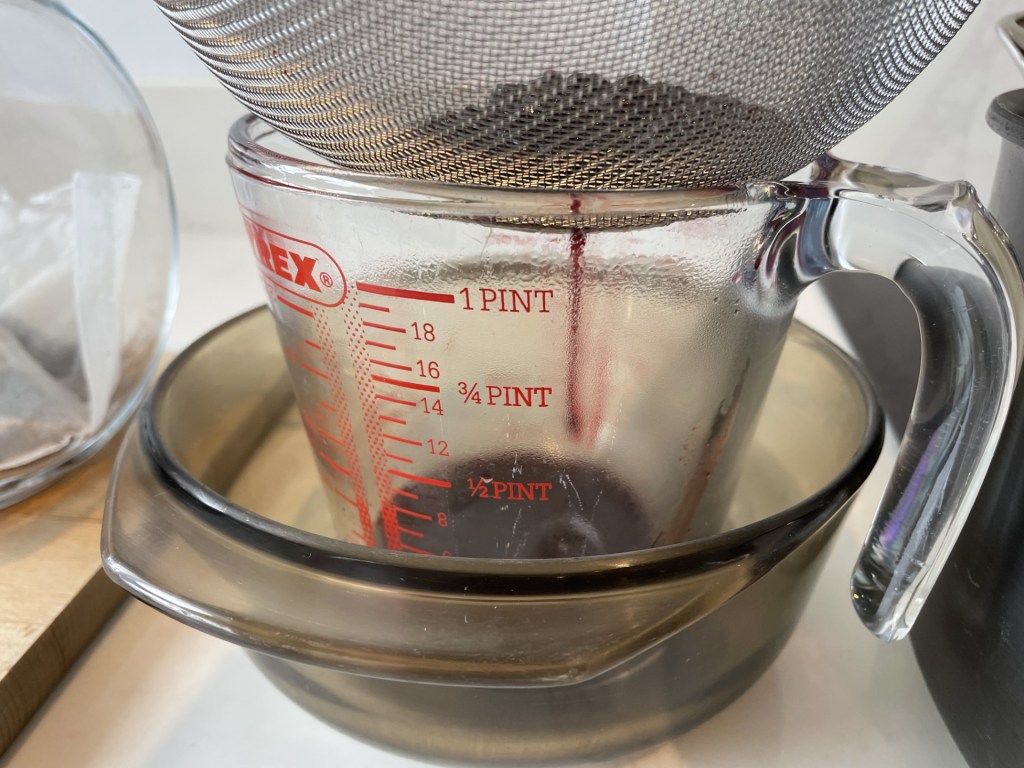
- If you would like smooth jam, carefully spoon the jam into a sieve, placed above a jug. Push as much of the jam through as possible and discard the seeds.
- If you are happy to have seeded jam, just ladle the jam directly into a jug.

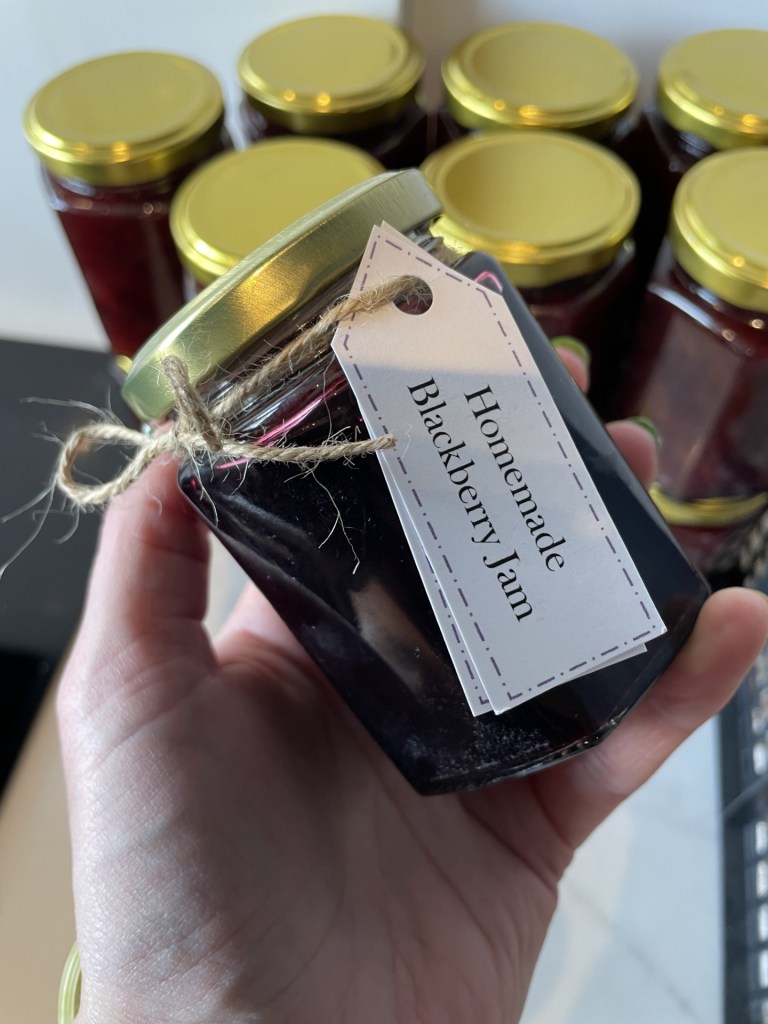
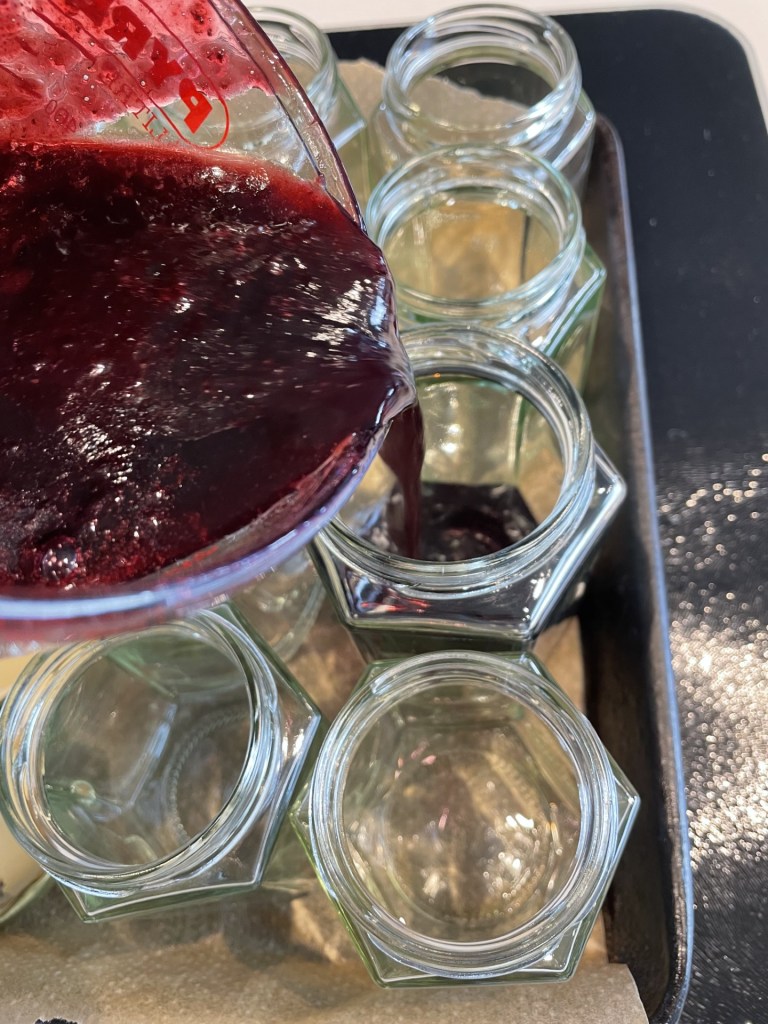
- Take the sterilised jars out of the oven and pour the jam into each one, making sure you don’t touch the inside or rim with your fingers or the jug.
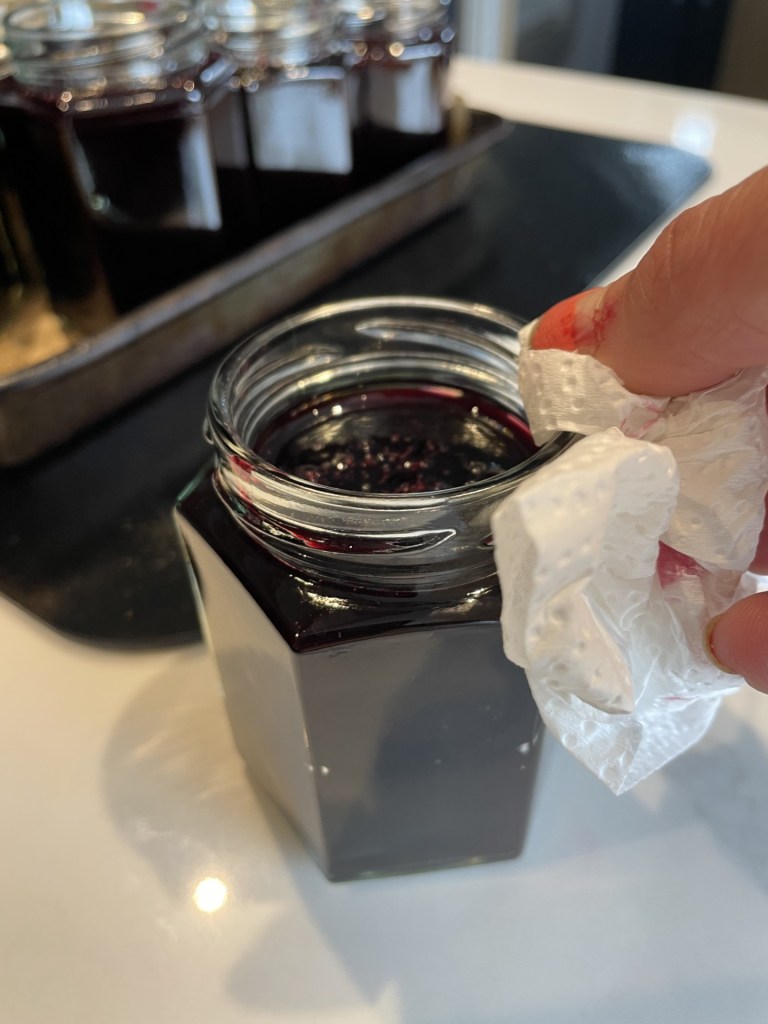
- Leave about an inch at the top of each jar and knock the bottom on the kitchen counter to knock out any air bubbles. Then, run a clean piece of kitchen roll under cold water and use this to wipe any drips or spills off the top and outside of the rim before putting the lid on tightly.
- Please be careful. The jam, the jars and lids will be hot.
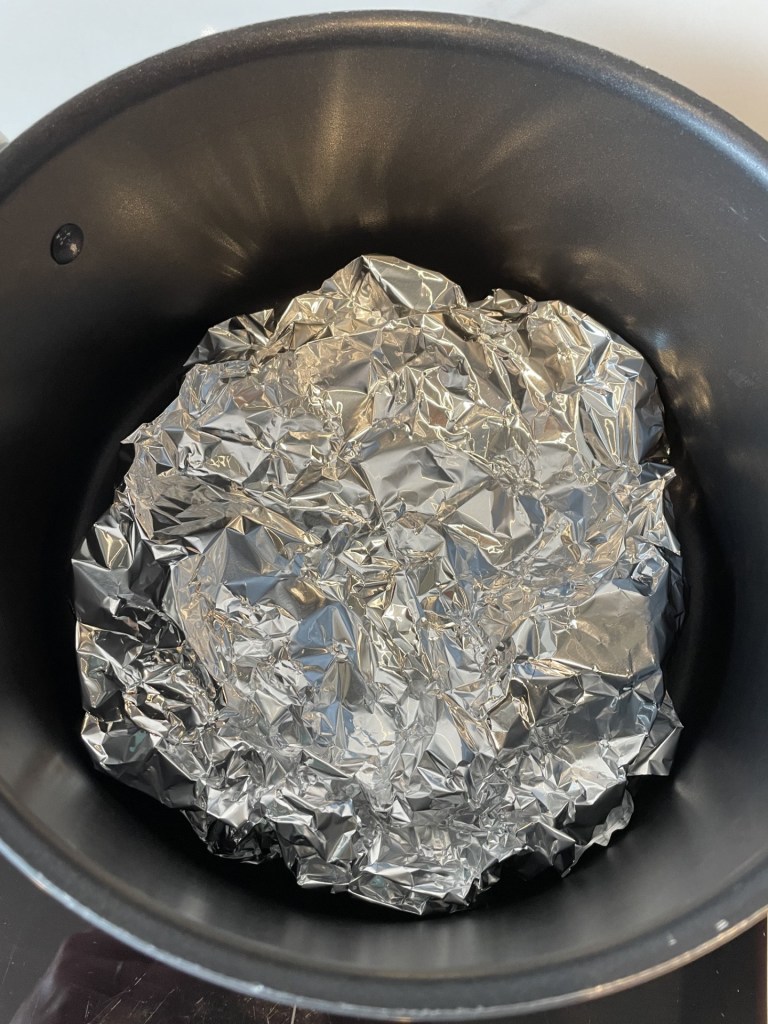
- Then, Take the largest pan you own, scrunch up some tinfoil and place it in the bottom. Arrange your jars in the pan so they are not touching and fill the pan with hot water. The water needs to be over the lids.
- Put the hob on a medium/high heat and bring it to a gentle boil. This will force any remaining air out of the jars and seal the lids on tight.
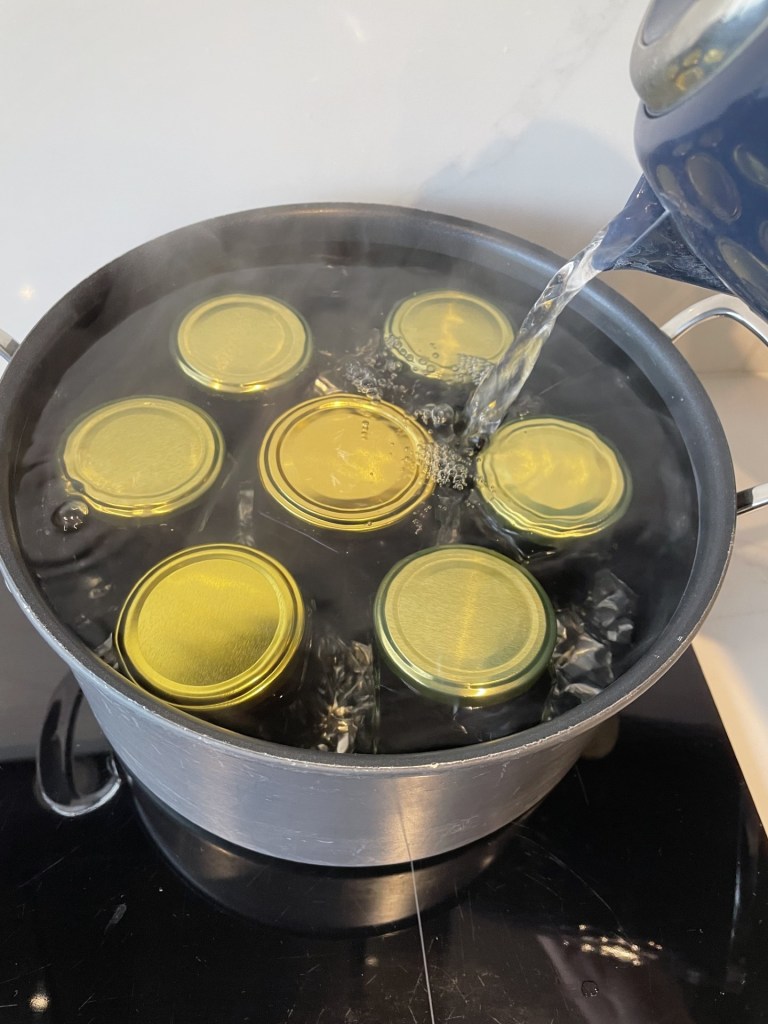

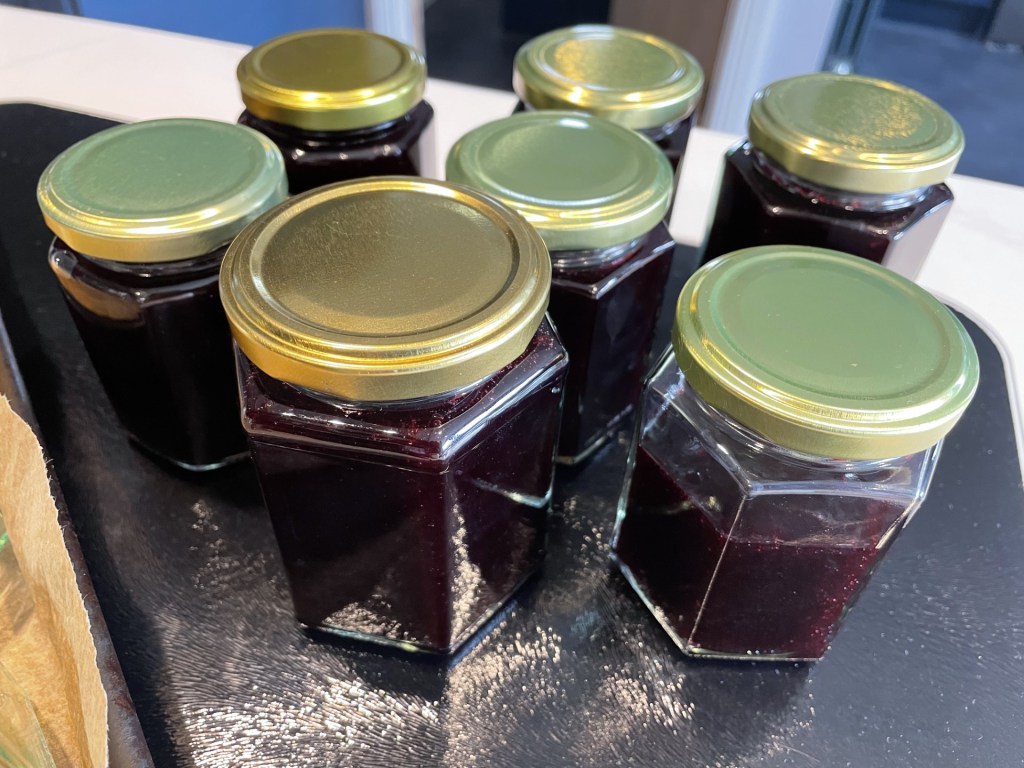
- Simmer for 30mins, then carefully remove the jars (I use BBQ tongs to do this) and set to one side to fully cool.
- Place the next batch of jars in the pan, top up the water and repeat until all your jars are sealed. If this process is done correctly and the jars were properly sterilised, the jam will keep unopened for up to 12 months.


If you liked this post, you may also like:
